Maker what?!
All across the globe, we are seeing these so-called makerspaces pop-up in schools and community centres. But what exactly are they? How do they benefit students? And what do you need to set one up?
Today we are going to answer these questions and explore how makerspaces have helped students all over the world learn new skills, especially in the realm of digital technology. So stay tuned and follow our guide for the best practices and makerspace ideas!
What is a makerspace?
A makerspace is a collaborative workspace designed for creating, learning, exploring, and sharing. These environments offer a blend of high-tech to no-tech tools that facilitate hands-on, creative ways to encourage students to design, experiment, build, and invent.
The concept of a makerspace stems from the maker movement, a cultural trend that places value on an individual's ability to be a creator of things rather than just a consumer. Makerspaces are typically stocked with materials like 3D printers, laser cutters, robotics, and craft supplies, and are often found in schools, public libraries, and community centres.
The benefits of a makerspace
In contemporary education, makerspaces are becoming increasingly relevant. They offer an avenue for applied learning, where students can test theoretical knowledge in practical, real-world contexts. In these spaces, students are encouraged to collaborate, think critically, solve problems, and innovate, fostering a range of essential 21st-century skills.
The result is a shift towards student-centred, exploratory, and experiential learning that can effectively prepare students for the future. In this sense, a makerspace is not just a place for making, but a place for developing a new generation of makers.
How to set up a makerspace
Setting up a successful makerspace involves a combination of careful planning, collaboration, and creativity. Here are our key steps to guide you through the process.
- Identify the Purpose: understand what you hope to achieve with your makerspace. Whether it's fostering creativity, teaching specific skills, or providing a place for independent exploration, having clear goals will help guide your decisions throughout the setup process.
- Secure a Space: determine where your makerspace will be. It could be a dedicated room, a corner of a library, or even a mobile cart that can be moved from room to room. Remember, a makerspace doesn't need to be large! It just needs to be a place where students can create and learn.
- Plan Your Layout: design your makerspace with creativity and collaboration in mind. This could mean having open tables for group projects, individual workstations for focused tasks, and storage areas for materials and ongoing projects.
- Involve Stakeholders: involve teachers, students, administrators, and even parents in the planning and setup process. Their input can be invaluable in creating a space that meets the needs of the people that will be using it.
- Choose Your Tools and Materials: based on your goals and budget, select the tools and materials you'll stock in your makerspace. This could range from basic art supplies and recycled materials to high-tech equipment like 3D printers and robotics kits. Keep in mind that the best tools and materials are those that encourage creativity, problem-solving, and learning.
- Develop Rules and Procedures: make sure users understand the guidelines for using the space, including safety rules, cleanup responsibilities, and procedures for using specific tools or equipment.
- Implement a Management System: develop a system for managing materials and equipment, scheduling the space, and tracking projects. This will help ensure that the makerspace runs smoothly and stays organised.
- Plan for Professional Development: provide training for teachers, educators, and other staff who will be facilitating the makerspace. They'll need to understand not just how to use the tools and equipment, but also how to guide students in their projects and foster a culture of creativity and exploration.
Essential equipment and technology
Designing a successful makerspace is about equipping it with the right tools that inspire creativity and learning. The following are some essential equipment and technology that should be part of any makerspace.
3D Printers
3D printers are almost synonymous with makerspaces now. They allow users to bring their digital designs to life in three dimensions, fostering design thinking and providing hands-on experience with additive manufacturing.
The Flashforge Adventurer 5M Pro is a versatile 3D printer that combines performance and safety. With an automatic levelling sensor and nozzle calibration, this machine is able to produce neat and precise designs at a faster rate compared to the previous versions. The Adventurer 5M Pro is compatible with both Mac and Windows, while for slicing software it can use either FlashPrint, OrcaSlicer, or Orca-Flashforge.

Laser Cutters
Laser cutters provide a way to cut and engrave materials like wood, acrylic, and cardboard with high precision. They can be used in a wide range of projects from art to engineering.
A great laser cutter is the Emblaser Pro, equipped with the world's first 60W laser module capable of producing intricate designs on materials like paper, wood, plastic, and aluminium. In addition, the machine's unparalleled safety features make it ideal for both community and school makerspaces. These include an on-board Material Ignition Alert system that automatically shuts down the laser cutter if potential ignition is detected. The Emblaser Pro is a Class 1 laser device, which is the safest classification available for such a machine.

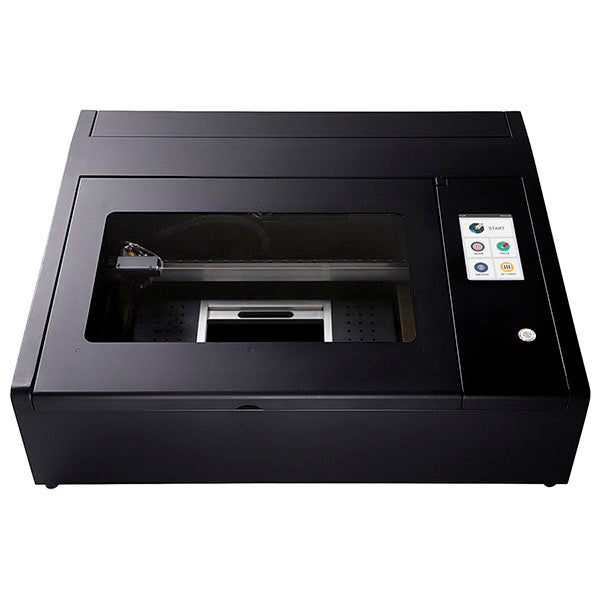
Another Class 1 laser cutter is the FLUX Beambox. Safety features include a Smart Lid Sensor, which automatically pauses the machine if the lid is opened, and an Integrated Ventilation System that helps to prevent fires and extracts smoke and fumes. The FLUX Beambox also has a rotary add-on which you can use to engrave cylindrical objects like mugs, pens, and glassware.
Robotics Kits
From simple kits that can be programmed to perform specific tasks to more advanced robotics platforms that can be fully customised, robotics kits are great for teaching problem-solving, engineering, and programming.
The Edison Robot is a particularly loved kit because of its compatibility with LEGO. Developed and designed in Australia, this toy robot helps students learn the basics of coding while nurturing creativity and critical thinking. The Edison Robot can be programmed using three different programming languages depending on the student's skill level: EdBlocks, EdScratch, or the Python-based EdPy.

For early learners, the best options are Matatalab’s creations like the Tale-Bot and VinciBot. These programmable robots use simple commands, loops, and sequences to introduce children to coding. They both come with a variety of lesson plans, and the VinciBot is also LEGO compatible, allowing kids to customise their robot.


Craft Supplies
While high-tech tools are exciting, never underestimate the power of traditional craft supplies. Items like glue guns, scissors, and hand tools can also be vital components of a makerspace, especially when it comes to hands-on learning.
Makedo Invent is an especially popular craft kit for classes made up of younger students and should be a staple of the makerspace playbook. Equipped with 360 reusable parts, this kit supplies students with the right tools to create their own designs from cardboard. The Makedo Invent is a good idea for community makerspaces or schools with a large number of kids, as it accommodates a lot of users and takes up little storage space.

Maintaining and evolving a makerspace over time
Establishing a makerspace is only the first step in what should be an ongoing journey of discovery, creativity, and innovation. As the educational landscape evolves, so too should your makerspace. Below are some considerations to keep your makerspace relevant, efficient, and ever-evolving.
- Stay Informed About Emerging Technologies: the world of tech is dynamic, with new tools and resources becoming available all the time. Make an effort to stay informed about these changes and consider how new technologies might enhance the learning experience in your makerspace.
- Regularly Solicit Feedback: the users of the makerspace—be they students, teachers, or community members—are an invaluable source of insight into how the space could be improved. Regularly ask for their input and ideas. Perhaps there's a piece of equipment they feel is missing, or maybe they have ideas for new projects or initiatives that could be undertaken.
- Professional Development: as technology evolves, so too should the skills of the educators managing the space. Professional development opportunities like workshops, courses, or conferences can help educators stay up-to-date with the latest tools and teaching strategies.
- Iterate and Experiment: a makerspace should embody the very principles of creativity and innovation that it seeks to foster in its users. Don't be afraid to change the layout, experiment with new tools, or try different ways of managing the space. This iterative process is a learning experience in itself and can help create a more effective, dynamic makerspace over time.
Build your makerspace with CD-Soft
At CD-Soft, we believe in supplying Australian educators with the best tools to help their students learn real world skills. Discover our range of 3D printers, laser cutters, robotic kits, and craft supplies. You can even find the ones mentioned in this article.
If you need any help selecting the right equipment for your makerspace or want more information regarding our tools, feel free to contact us! One of our friendly team members will be happy to assist you.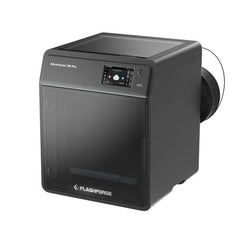 Flashforge Adventurer 5M Pro 3D Printer - $759.00 inc GST
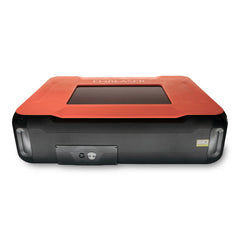 Emblaser Pro - Laser Cutter & Engraver (60W) - $4,829.00 inc GST
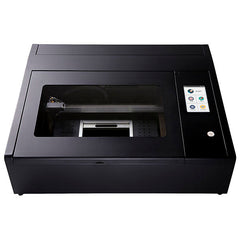 FLUX Beambox CO2 Laser Cutter & Engraver - $6,045.00 inc GST
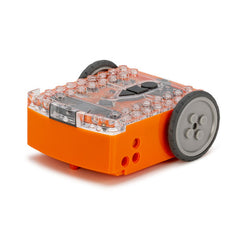 Edison Robot V3 - $59.95 inc GST
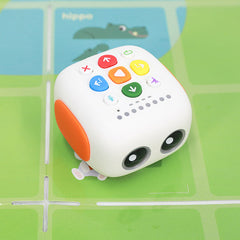 MatataStudio Tale-Bot Pro Robot - $174.90 inc GST
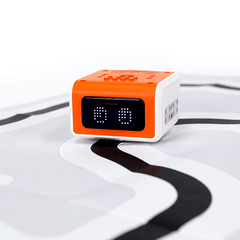 MatataStudio VinciBot Robot - $196.90 inc GST
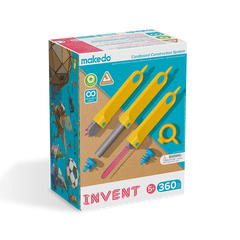 Makedo Invent Kit (360 Pieces) - $195.00 inc GST


